Thursday, April 23, 2015

I'll miss you the most...


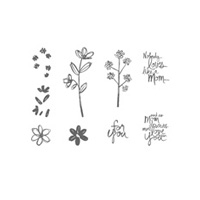
Some of you have seen this card before.  I don't know the date I originally did it, but it's a favorite of mine.  When the retiring list came out, like most demonstrators, I sat and went through the retiring stamp set lists and grumbled and groaned at some of the ones slated for retirement.  Regarding Dahlias is by far one of my favorite sets.  I love the image as well as the sentiments in this set.  


Add Blackberry Bliss and the Emboss Resist technique and you have the recipe for one of my favorite cards of all time.  I love the edgy yet earthy feel to this card.  It's simple, yet has a wow factor sure to make everyone say "how did you do that?"

I will say I'm beyond excited about the new catalog being announced and can't wait to see what Stampin' Up! has in store for us, so loosing an old favorite stings...but not for long!

Stay tuned for more flashback projects using retiring products as well as some new ones!


Tuesday, April 21, 2015

The Retiring List is HERE!


Please note the Accessories will only be available WHILE SUPPLIES LAST!  
Stamps will be made through May 26th to meet demand!

Let me know if you have any questions and look for lots of retiring goodie projects coming up!!!

Monday, April 20, 2015

Adventure Bound Birthday


It's time for another Masculine Monday project and this one is featured at my Just Cards Class this Friday!  Click HERE for more information about that!
This card uses the super cool paper from the Adventure Bound Paper Stack in the Occasions Catalog.  I love this paper because one side has photographic images and the other side has neutral color patterns. This paper was made for masculine card making!
This card uses the following paper dimensions:

Smoky Slate: 5 1/2" X 8 1/2" scored at 4 1/4"
Whisper White: 5 1/4" X 4" inside layer
Whisper White: 3/4" X 3"
Island Indigo: 3/4" X 3 1/2"
Rocks piece: 4" X 2"
Water piece: 2" X 5 1/4"

Stamp your Happy Birthday sentiment on your small piece of Whisper White in Island Indigo ink.  Pennant the ends with your Paper Snips.  Pennant the ends of your Island Indigo piece as well and layer with SNAIL adhesive.
Stamp the anchor image at the top right hand corner in Smoky Slate ink from the By the Tide stamp set.  Layer your DSP layers on with SNAIL adhesive.
With Dimensionals layer your Birthday Sentiment layer.  Put the inside layer inside your card and consider this one done!

Supply List:

Sunday, April 19, 2015

Mother's Day Craft Journal


Mother's Day will be here before you know it!  If there ever was a DIY holiday, Mother's Day would be it!  Mom's love handmade and thoughtful gifts...we really do!
This project uses the Kraft Grid Journals from the annual catalog on page 200.  They measure 3 1/2" X 5 1/2" but you could totally use the larger version in the Occasions Catalog on page 25.  Those measure 5" X 8 1/2" so they are significantly larger!  This journal lends itself to all kinds of uses, journaling, brag book, photos, to do lists, you could even personalize it for the mom by filling it with pages of things you love about them!  Get the kids involved, draw pictures, glue in photographs and write notes to mom!


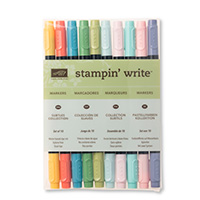
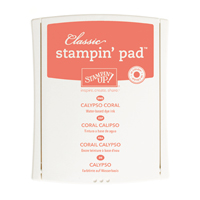
The flower is stamped using Crumb Cake ink directly on the journal.  Then take your Old Olive Stampin' Write Marker and Calypso Coral Marker and color the coordinating stamp for the leaves and flowers.  Stamp off on your grid paper and then stamp onto the flower outline image.  This will create a much lighter effect.  The sentiment is heat embossed with Calypso Coral embossing powder to give this journal it's wow factor!  Add a pearl to the 'o' in mom for a little extra something!


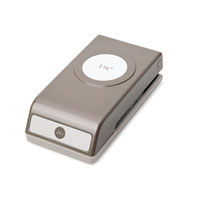
I ran a strip of Sweet Dreams Designer Washi Tape down the side of my journal's spine.  You may want to put a little extra adhesive under it to keep it in place.  On a scrap piece of Whisper White card stock, stamp the small flower image with Crumb Cake ink twice.  Then stamp the inside of the flower image with Calypso Coral ink.  Punch both flowers out with the 1 1/4" Circle Punch.  With a scrap piece of Pear Pizazz card stock, punch out two 1 3/8" Circle Punches.  Adhere the flower circle to the Pear Pizazz circle with SNAIL adhesive for both pieces.  On the back side of your Pear Pizazz circle put a strip of Fast Fuse or Sticky Strip down for the ribbon.  Place Dimensionals on either side of the Fast Fuse.  Fold an 18" piece of Pear Pizazz Cotton Ribbon in half and place it on top of your Fast Fuse.  Remove the Dimesional backs and place the other circle on top sandwiching your ribbon.  Put a pearl at the center of each flower and your bookmark portion is done!

If you like, sponge the edges of your journal with Crumb Cake ink for a little added effect.

I hope you guys enjoyed this project and will make one for a mom you love in your life!

Supply List: