Friday, March 27, 2015

SAB Celebration #4


Fancy Lotus Blossom Card

This card is just so pretty...it makes me happy...really happy : )

So here's what you will need to create it:

For the Front of the Card:
Soft Sky Card Stock: 5 1/2" X 8 1/2" scored at 4 1/4"
5 1/4" X 4" embossed with the Spring Flowers Embossing Folder
Whisper White: 1" X 4 1/2"
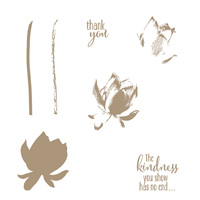
Scrap for flower
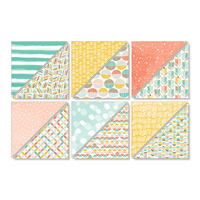
Best Year Ever DSP: 2" X 3 3/4"

Inside of the Card:
Whisper White 5 1/4" X 4"
Best Year Ever DSP: 1/2" X 5 1/4"

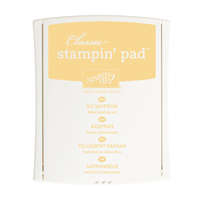
To create the flower you will need So Saffron ink.  Start with the #1 stamp and stamp it on your piece of Whisper White.  With your #2 stamp, stamp off once before stamping it over top the #1 image.  Lastly take your #3 stamp and stamp off twice before stamping on your image.  
Use Wild Wasabi ink to stamp your stem piece that looks speckly.  Then stamp off before stamping your solid piece of stem.

Watch the video below for full instructions:


Supply List:

Thursday, March 26, 2015

SAB Celebration #3


Simple Irresistibly Yours DSP Window Box

This simple to put together box would be great for party favors or wedding favors!  Although I left the paper without ink, you could absolutely use your favorite color to spruce up your box any way you like.  Sponge it, sponge dauber it, spritz it, brayer it...your choices are endless!  

So let's get to it, making the box:

Irresistibly Yours DSP measuring 4" X 8 1/2" 

With the 4" side at the top of your Simply Scored, score at 2"
With the 8 1/2" side at the top, score at 2", 4", 6" and 8"

Remove the small rectangle at the bottom of the box, and trim up all the score lines.  Using your Petite Petals punch, punch the square that is second from the edge that will be folded over.
Take your 1 3/4" Circle Punch and punch out a piece of Window Sheet.  Use SNAIL adhesive to adhere this to the back side of the Petite Petals punch.  Now place Fast Fuse on the 1/2" edge and fold your box over.  Fold in the sides and back piece.  Apply Fast Fuse to the front piece and fold it over, securing the bottom of the box.  Fill with your treats and you're done!

Watch the video below for complete instructions:


Supply List:

Wednesday, March 25, 2015

SAB Celebration #2


This fun card uses bright colors and bold papers to make someone's birthday extra spectacular.  So let's get started on how to make it!
You'll need the following paper:
Pacific Point 4 1/4" X 11 scored at 5 1/2"
Whisper White 4" X 5 1/4" and scrap for the punched image
Birthday Bash DSP measuring 1 1/2" X 4", 3/4" X 4" and 3/4" X 5"


Score your piece of Pacific Point Card Stock on your Stampin' Trimmer at the 5 1/2" mark and fold in half.  Now place the paper back on your trimmer and with the left side of the card at the 3" mark, trim up to the score line from the bottom of the card.  You will essentially be trimming off 1 1/4" from the front of the card.  Take the paper off the trimmer and use your Paper Snips to trim at the score line down to the cut line you made.  
Now take the 2" circle punch and punch a 1/2 circle towards the right hand side of the trimmed piece. 
Place your Whisper White inside piece down and close the front, exposing where the circle punch made a window.  This is where you will stamp your cake image.  
While you are stamping, stamp the sentiment on your scrap Whisper White and punch it out with the 2 1/2" Circle Punch.  Now stamp the "celebrate" image from the same stamp on the piece of Pacific Point you removed from the card.  Fussy cut it out with your Paper Snips.  Using your Stampin' Write Markers, I used Pacific Point, Daffodil Delight and Tangerine Tango, color in your images as shown.

Using SNAIL Adhesive, adhere the inside Whisper White piece and the Birthday Bash DSP.  Using a Dimensional, pop up the sentiment circle you punched.  Pop up the "celebrate" image you cut out over top of the original.

Here's the video:


Supply List:

Tuesday, March 24, 2015

SAB Celebration #1


It's time for a fun series celebrating Sale-a-Bration!  Starting today through March 31st, I will be posting a project with video using SAB products!  I don't want you to miss out on these awesome products, so here is your daily reminder!  
The first project is a super cute Easter project using the Best Year Ever Designer Series Paper.  These could be made super fast and you will get 4 treat pouches from each piece of DSP!  

Watch the video below for complete instructions:


Supply List: