Saturday, July 4, 2015

Just for you Tiny Treat Box - BWB Video Series

It's no secret I LOVE the Tiny Treat Boxes!  With 26 in a package, they are perfect for favors, school class mates and random handouts!  Whether you want to fill it with candy, a little note or give jewelry, this box is the ticket!
On the video you will see me use the brand new Washi Label Punch for the sentiment.  I would love to know which look you like better.  The pennanted one or the punch!  
Don't forget you have a chance to win this project.  Just follow the directions at my YouTube Channel.  Like the video, comment on the video and be sure to subscribe to my channel if you haven't already!


Here are the measurements:
Everyday Chic DSP; 5 pieces measuring 1 7/8" X 1 7/8"
Basic Black: Scrap
Whisper White: Scrap and 1/2" strip for sentiment if not using the Washi Punch

Adhere the DSP squares to the sides and top of your box being sure you have your pattern going in the right direction.  Create the box and using a 3/4" Circle Punch, cut out a 1/2 circle from the 'thumb hole' at the front of the box.  You can now close the lid.  
With your 1 3/4" Scallop Circle and Bitty Butterfly Punches, punch out pieces of Whisper White.
Using your 1 1/2" Circle Punch, punch out a piece of Basic Black Card Stock.
Stamp your "Just For You" sentiment in Momento Black Ink of your strip of 1/2" Whisper White card stock.  Pennant the ends with your Paper Snips or Banner Punch.
Use a bit of SNAIL to attach the sentiment to the bottom of the Basic Black Layer.  Using a Glue Dot attach the butterfly at the top.  Adhere the Basic Black circle to your Whisper White scallop circle and then attach it to the box with Dimensionals.
Add a few Rhinestones are your box is ready to give!

Supply List:


Friday, July 3, 2015

Butterfly Note Card - Black, White and Butterfly All Over Series


This project is super simple and requires only stamp, ink and paper!  You could create a whole stack of these thank you notes in no time at all.  It starts with the Whisper White Note Cards and Envelopes.  These beauties are a hidden gem in the catalog.  They come 20 note cards and 20 envelopes to a pack and they are prescored, which makes them perfect for beginning stampers!  
The beauty of the Watercolor Wings stamp is that it doesn't have to be used with the framelits to be beautiful.  Sure the framelits make these butterflies pop, but you can create beautiful, simple projects without them!
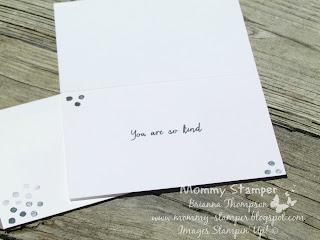
I have stamped the front of this card with the butterfly image in Black Momento ink.  You will need to stamp the butterfly body and  antennae as well.  Along the bottom of the card I stamped the dots image without reinking towards the center and did the same on the other side. 


Simply stamp the inside as shown with your sentiment and dots image to finish this super simple and beautiful project.
Watch the video below for full instructions:


Don't forget you could win this project!  Just leave a comment on this project on my YouTube Channel, like the video and be sure to subscribe to my Channel!

Supply List:


Thursday, July 2, 2015

Watercolor Wings Mini Book


Check out this super cute mini book created with the Watercolor Wings and Everyday Chic DSP!  You can get 2 of these books from each 12"X12" sheet of DSP.


Perfect for the mom's or grandma's in your life to put pictures of their favorite little people in, this mini book is a delightful 3" X 3" size that will fit nicely in anyone's purse!

Here's what you'll need:
Everyday Chic DSP 6"X12" 
Dazzling Diamonds Glimmer Paper Scrap
Basic Black Card Stock Scrap
Whisper White Card Stock Scrap
15" of Whisper White Cotton Ribbon

With your DSP in portrait orientation (the 6" length at the top) score at 3".  Now flip your paper in landscape orientation and cut it at 3" pieces for a total of 4 pieces.  Being sure to have all your patterns in the right direction, attach each section of the book to the next using SNAIL adhesive.  Once all four layers are attached your book is created, now it's time to decorate!
Wrap your ribbon around using SNAIL to adhere it to each side tying a bow on the side.
Stamp your butterfly image in Momento Black Ink on your Whisper White scrap and punch it out with a 1 3/4" Circle Punch.  Punch out a piece of Basic Black with a 2" Circle Punch.  Lastly, punch out a piece of Glimmer Paper with your 2 3/8" Scallop Circle Punch.  Using a 2 Way Glue Pen apply glue to the inked parts of the butterfly.  Apply Dazzling Diamonds Glitter to the butterfly and allow it to dry.  Layer all punches together and attach it to the front of your mini book.
It's ready to give!
Don't forget you can win this project!  Leave a comment on the video post in YouTube, like the video and Subscribe to my channel for your chance to win!
Watch the video below for full instructions:


Supply List:


Wednesday, July 1, 2015

Watercolor Wings Container


We're starting a new video series called Black, White and Butterfly All Over!  We will be using the Watercolor Wings Stamp set, Momento Black Ink and the Everyday Chic DSP for these gorgeous projects starting with this one!  This container is easily my favorite of all the projects, so it seemed right to kick off this series with it!  I found these containers at Target in their Dollar bin at the front of the store.  It's called a seed container and it's just a tin container with a lid.  Very simple and plain until we purdy it up that is!


Watch the video below:


So here are the dimensions for this project:

The DSP wrapped around the container is 2 5/8" X 12"
The DSP on the top is the 6th from the inside of the Circle Framelits
A 2 3/8" Scallop Circle Punch in Whisper White
2" Circle Punch in Basic Black

Stamp the butterfly images on Whisper White card stock with Momento Black ink and cut them out with your Bold Butterfly Framelits and Butterfly Thinlits Dies.  

Rhinestones and some Silver Metallic Thread add some added interest to this beautiful project.  
Don't forget you can win this tin!  Just leave a comment on my YouTube Channel on this specific video, like the video and be sure to Subscribe to my Channel while you are there!
Winners will be announced after all projects are posted!

Supply List: