Hi everyone! I'm sure by now you have noticed my postings have been few and far between. I'm suffering from growing pains! As you know, it's summer break and I have 3 children at home...all day long............................... Between everyday tasks, 3 kids, vacations and 2 businesses I'm busy to say the least! I'm working very hard to update things and keep you up to date on the things that may change. For starters, my online presence is going to take a hit. Believe it or not, being online in several areas is quite time consuming. I will however still post videos, blog posts, Facebook posts and Pinterest findings as I'm able! Please hang in there with me while I find my new groove! My in person class schedule will not change. I will still be doing my Just Cards Class as I always have. My online classes, for now, will be removed until I can find the time to dedicate to them. I appreciate your understanding and hope you will join me for an in person class or even take advantage of the Class by Mail option for Just Cards Classes! Let me know if you have any questions or comments! Email me HERE
Thursday, July 23, 2015
Tuesday, July 14, 2015
Monday, July 13, 2015
Butterfly Frame
Are you butterflied out yet?! Never!
This project hangs in my craft room as a decor element and I love it!
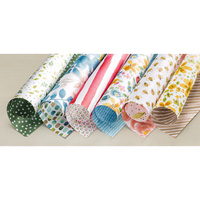
It starts with a decorative frame designed with inserts. I measured all the spaces and then designed each block separately before placing it in it's space. All of the designer series paper is from the English Garden pack. I chose the colors straight from the paper! Stampin' Up! makes coordination a breeze when you use what they've already given you. I often start with a DSP and pull my colors from it to work with before I event start a project.
This would be a great gift for someone you love!
Supply List:
Friday, July 10, 2015
Cherry On Top Class
Could this class get any cuter!? This is my Cherry On Top Class and it includes the following:
All the kits for these projects, pdf's on putting the together sent straight to your email, Cherry On Top Designer Series Paper Stack and Cherry On Top Washi Tape! Plus it includes shipping right to your door! Click HERE for more information or to sign up, but hurry, July 14th is the last day to join!!!
Wednesday, July 8, 2015
Tuesday, July 7, 2015
Butterfly Frame - BWB Video Series #7
Last, but not least! This is my favorite of all 7 projects for one simple reason...my hubs. Yep, I'm that lucky girl who got to marry her best friend. Together we have 3 beautiful children and love our little family together. This project is super easy to do and would look amazing on anyone's desk.
I found this frame at the dollar store. It's a 5X7 clear plastic frame with a wrap around bottom. I slide a 5" X 7" piece of Everyday Chic DSP in between the two layers of plastic.
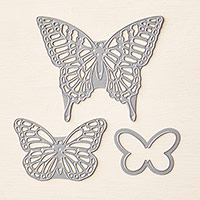
To create the banners, just cut out a banner using Basic Black. Stamp your sentiment on a piece of Whisper White card stock and with the next size smaller banner, cut out your sentiment. Layer the two and attach it to the front of your frame. The full butterfly is cut out with Bold Butterfly Framelits and a piece of Dazzling Diamonds Glimmer Paper. Stamp your butterfly image on a piece of Whisper White and cut it out with the Butterfly Thinlits. Add a piece of Wax paper between your image and thinlit to aid in getting it out.
Attach this piece to the top of your banner and attach your favorite picture and your done! Ready to gift or set on your desk!!
Watch the video below for visual instruction:
Monday, July 6, 2015
Project Life by Stampin' Up! BWB Video Series #6
Did you know that Stampin' Up! partnered with the amazing Becky Higgins, creator of Project Life, to offer exclusive Project Life by Stampin' Up! products! I have a space in my craft room solely dedicate to all of my Project Life goodies. As a mom with 3 small children there are lots of moments that warrant photographs that can be documented and treasured forever! I want my children, grandchildren and future generations to be able to touch photographs and paper that has my hand writing on it so they too can experience our life through documenting our story!
This page is done simply, which is the beauty of Project Life. You can fancy it up any way you want, or leave it super simple. I started with one of our 6X8 Page protectors number 03. The 4 pockets are 3" X 4". After stamping, punching and sliding those bits in my page was done in a jiffy!
You can watch the video below and be sure to follow the instructions to enter to win a PLxSU page just like this one (minus the pictures of course!)
Sunday, July 5, 2015
Glassine Butterfly Card - BWB Video Series #5
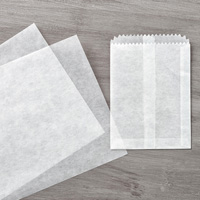
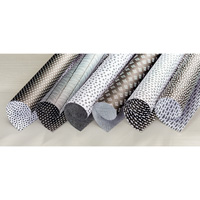
This card screams elegant! I used the new Glassine Sheets from Stampin' Up! to give this card some amazing texture and interest.
The pictures do this butterfly no justice!
The butterfly itself is 3 layers, using both the Butterfly Thinlits and Bold Butterfly Framelits Dies to create this look. So lets get started with this project:
Whisper White Card Stock: 5 1/2" X 8 1/2" scored at 4 1/4, Scrap for Butterflies
Everyday Chic DSP: 4" X 5 1/4"
Glassine Sheets: 3 3/4" X 5", Scrap for butterfly
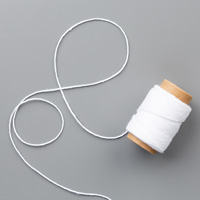
Whisper White Baker's Twine: 36"
Fold your card base along the score line. Attach the piece of DSP to the front with SNAIL adhesive. Take your piece of Glassine that measures 3 3/4" X 5" and squish it! Yep, cumple it all up! 3 or 4 times actually, flattening it back out between crumpling it. Once you are happy with the way it looks, attach it to your DSP layer with 2 way glue pen. I selectively chose under where the butterfly would be and the corners. You will still see where this layer is attached, but the 2 way glue pen makes it a little less noticeable.
Wrap your twine around your card starting at the front where the butterfly will be. Use Scotch tape to secure it. Wrap around your card 3 times and end back where you started, adhering again with tape. Trim off any excess.
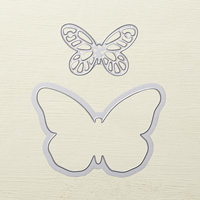
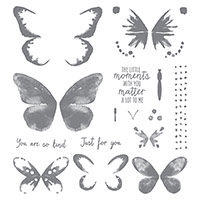
Now for the butterflies! With your Stampin' Pierce Mat underneath, stamp the butterfly image with the 2 outside wing images in Momento Black ink. Also stamp the smaller butterfly image that has the dots in the image. Be sure to stamp this separately, not on top of the other image. Place a piece of wax paper over the small butterfly image and and run it through the Big Shot with the Bold Butterfly Framelits and Butterflies Thinlits Dies. Now using the small full butterfly image die from the Butterflies Thinlits Dies, cut out a piece of Glassine Sheet.
Once your larger butterfly is cut out, you can come back in with the butterfly body image and stamp it. I find it easier to do this after I run the butterfly through the Big Shot.
Now attach the butterflies together using 2 Way Glue Pen. Place Rhinestones on top of the Glassine Butterfly body. Attach your butterfly to the front of your card using Dimensionals.
It's ready to give!
Supply List:
Subscribe to:
Comments (Atom)


