Two of my favorite colors together are Bermuda Bay and Strawberry Slush. I don't know why...but they sure do make me happy. And so do tiny treat bags, new stamp sets and sweet little birds! So basically this project makes me squeal happy squeals!
This cute lil' birdie banner comes from the new Hey, Valentine stamp set. There is a coordinating framelit for the banner in the Mini Treat Bag Thinlit Dies set, or you can just cut it out by hand like I did.
One of the best parts of this banner is the back side is cute too!
All you need to do is stamp it in Black StazOn Ink and then use your Stampin' Write Markers to color in the images any way you want.
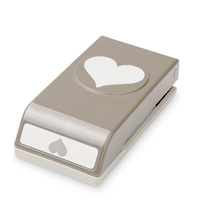
When you get to the top of the bag you want to fold your banner over and then punch a 1/8" circle punch through all the layers. Then thread through a piece of Strawberry Slush Baker's Twine and this sweet little bag of squeals is done!
Although this bag is obviously decorated differently, the pattern and dimensions are the same for a previous treat bag I did. You can watch the video below for all the dimensions!
Stars seem to be increasingly popular in the world of cards. Which I suppose should be no surprise...who doesn't love stars, right?
Pair stars with a natural color palate with a splash of gold...you have my attention!
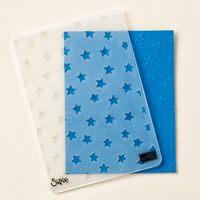
The base of this card starts with Very Vanilla. Rather than just embossing the front of the card, I decided to cut another piece of Very Vanilla measuring 4X5 1/4" and embossed that with the Lucky Stars Embossing Folder. Pop that layer up on some Dimensionals for some added character to your card. Banner Framelits are the supporting role in this card. I used them to cut the Crumb Cake layer as well as the Very Vanilla one stamped with the Hello sentiment.
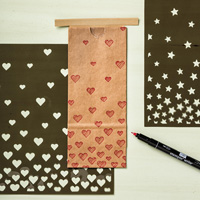
Those sweet little stars on the Crumb Cake banner are done using the Hearts and Stars Decorative Mask and some good ole' White Craft Ink. Using a sponge dauber you can apply the craft ink using that mask for this extra layer of stars.
The extra stars punched out of gold foil paper are popped up again with dimesionals.
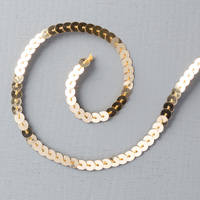
Finish the card off with some Crumb Cake Seam Binding Ribbon and Gold Sequin Trim and this Wow project is finished!
Time for another Masculine Monday project! This week might catch me a little slack because at first glance you may say...."I see a bow and rhinestones....right..." But hear me out! I would totally give this card to my hubs...totally. It's crazy simple and with the added Typeset DSP it's a shoe in for a man card! Right?! If it's just a touch too feminine for your man, you can always chance the bow to a knot and leave off the rhinestones.
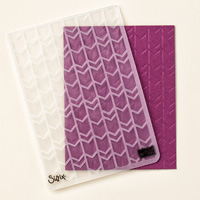
I adore this little xoxo stamp from the Project Life Remember This stamp set. I use that stamp set more for card making than I do for Project Life! So many cute little sentiments that go perfectly on cards! Another masculine feature to this card is the embossing folder. I'm a big fan of this EF for masculine projects. I hope you guys are getting some inspiration from our weekly man projects!
One of the hidden gems in the Annual Catalog is the Sweet Treat Cup. These little cups come in a pack of 12 ready to add to fun projects! I've used them for punch art bunnies filled with M&M's, on top of boxes filled with confetti and on the front of cards for some added flair. The possibilities for these fun little additions are endless.
The card shown can be done in either a portrait or landscape orientation. The fox and baby cards are done in landscape and the heart card done in portrait.
No matter which direction you want your card you will need similar ingredients. You will need a piece of 5 1/2" X 11" base card stock scored at 4" and 8".
The inside panel measures 5 1/4" X 3 3/4".
You will need two pieces of Designer Series Paper, one measuring 1/2" X 5 1/2" and the other measuring 2 1/2" X 5 1/2". You can also use a piece of washi tape, ribbon or strip of card stock.
The 2 1/2" X 5 1/2" piece of DSP goes on the first inside flap.
I'm sure you are wondering how to get the sweet treat cup and DSP lined up with the front so it slides through, right?! Good news, I did a video! You can watch it below for those of you who are visual learners like me. If you like written instructions, I will do my best!
Place your piece of 2 1/2"X 5 1/2" DSP on your first inside flap. You want to make sure that the edges on top and bottom are about equal. Also make sure that your DSP has the side you want showing up. Gently fold over the top piece of your card. With the card pinched together keeping that DSP in place, reach under it and lift it up carefully along with the top flap. With the DSP in place you want to use your 1 3/4" punch to punch out both the card stock and DSP layer simultaneously. You can punch on either side or in the midde, wherever you want your cup to sit. I did mine towards the side. Once you have your circles punched you can let go of the layers. Now when you assemble your card, it will line up perfectly!
For the next part you want to liberally apply adhesive to the back of your DSP piece. Remove the paper strip on the Sweet Treat Cup. Now looking at the inside of your card, you want to place the DSP panel with the adhesive side up over your punched circle in your front flap card stock. Then drop in your Sweet Treat Cup filled with confetti. Now fold up your card gently. Push all around the Sweet Treat Cup on the front to adhere the DSP layer. When you open your card it will be like magic! Everything will layer in place perfectly. Now you can finish decorating your card!
I recently attended an upline's quarterly meeting and created these awesome projects while I was there! So many ideas! I love being able to spend time with other demonstrators in my team and creating beautiful projects to show my customers! None of these cards were designed by me, I only assembled them, so to anyone who did create the original design, I thank you! They are beautiful!
Enjoy the close ups below an perhaps next meeting you can join me! I would love to have you as a guest or a new team member! Sale-a-Bration truly is the best time to become part of my team. Extra product, earn cash back to use on the 2015-2016 Annual Catalog, earn SAB items, the list goes on and on! Considering it??? I sure hope so! Click HERE to let me know you would like a "Think About it Packet" and I will mail you one right away, or CLICK HERE to see more information about joining my fabulous team of Paper Peeps!