

Tuesday, May 19, 2015
Monday, May 18, 2015
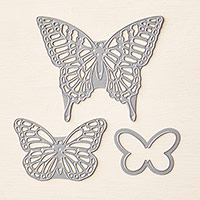
Cotton Paper Flowers Butterfly Wreath

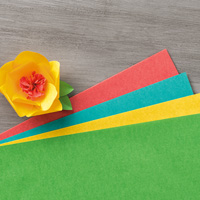
Okay....I'm in love with the Cotton Paper...seriously. I might hoard it...hoard it.
This paper is the bomb! It has the flowing nature and beauty of tissue paper with strength and integrity. You can bend and push this paper in all different ways and it will stay put! Flatten it back out and fluff it again and it will look as good as it did the first time!

These beauties are made using the Floral Framelits. I used the largest Flower of both shapes. There are 6 layers of each, stapled together and fluffed to look pretty!

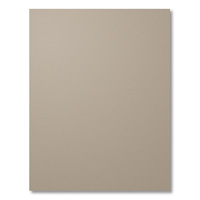
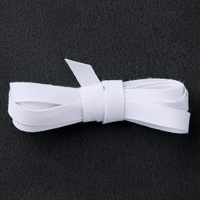
The butterfly is of course cut with the Butterfly Framelits. I used another new in color, Tip Top Taupe. It then traced the butterfly image on a piece of Very Vanilla card stock and hand cut it out. Using a 2 way Glue Pen I attached the butterflies together to create this effect. Everything has been hot glued to the wreath, including the ribbon.
This simple wreath was done in less than 30 minutes and would make a wonderful gift!
Supply List:


Saturday, May 16, 2015
DIY Dry Erase Frame

It's no secret I love any DIY project, especially ones that are easy peasy! This project is just that! Talk about an awesome gift for someone, done in a flash!
I got the idea for this project from our latest Stampin' Success Magazine. It's a demonstrator perk I look forward to every other month. It's filled with lots of tips and tons of ideas on using products different ways. A cute dry erase frame, yes please! So lets get started!
The first thing you will need is a frame. I'm a cheap-o thanks to 3 expensive kids (lol) so I get mine from the dollar store, but any frame will do!
Next, pick a DSP. I chose the Maritime paper because I love the color, Coastal Cabana and the beachy theme. I cut my paper down to 5" X 7" because it fits in my frame, but you will need to cut yours to the size of your frame.

Next is the stamping. I chose the "This Week" sentiment from the Remember This stamp set and the star fish from the Sea Street set. I stamped them with VersaMark ink and heat embossed them with Calypso Coral Embossing Powder. Now I will throw it out there since we are on the topic, both the Maritime DSP and Calypso Coral powder are retiring! Click HERE to go to my online store before you miss out!
I added a bit of Whisper White Bakers Twine and Pom Pom Trim for a little extra something!

Watch the video below for another version of this project!
Tuesday, May 12, 2015
Bandaid Box for 3X3's

NEW PRODUCT ALERT!
Loving some of the new product we were able to preorder! Loving being a demonstrator today! Well, everyday! When I saw our preorder list I was so glad the Friendly Wishes Stamp Set was one of our choices. It's absolutely adorable! Add it to the Cherry On Top DSP and you've got a combination that makes this chick happy!
Watermelon Wonder is the new In Color I chose to use for the box, and it along with all the other new goodies will be available on June 2nd in my online store!
You of course can join my fabulous team of Paper Peeps and get some preorder goodies in your kit as well as the new 2015-2016 Stampin' Up! Catalog way before customers can! Click HERE for more information!
So here are the other examples I made using different products to show the versatility of this adorable little box!


Here are the directions to make it!
Card Stock: 5 1/4" X 9"
In landscape orientation score it at 3 1/4", 4 1/4", 7 1/2" and 8 1/2"
In portrait orientation score it at 1" and 4 1/4"
Trim off the skinny rectangle and square created at the end with the 1/2" and 1" score marks on both sides. Now trim up on the tabs created in the middle. Place adhesive on the tabs and fold up the back of the box first (the part with the tabs). Then apply adhesive to the sides and fold up the remaining parts to create the box.
DSP: 2 pieces measuring 3" X 3" on the front and back of your box.
Use a small oval punch or circle punch to punch out a small 'thumb' hole at the front panel of the box.
Tie around a piece of ribbon and attach your sentiment of choice, and your project is complete!
Watch the video below for complete instructions!


Monday, May 11, 2015
New Products!
Okay, I'm back! I hope! Between Baseball games, Mother's Day, planting a garden and a sick kid, this mama has been stretched! I'm happy to report that my pre-order arrived and this morning I was finally able to play with some of the my new goodies!!
Here's my first creation;

If you want to play a little game of "I spy", I will tell you that all of the products on this project will be in the upcoming catalog! So that's great news for those Butterfly Basics lovers!
This project starts with one of the Take Out Boxes. Easy put together, these are a must for gift giving! I wrapped the box with some of the new In Color Envelope Paper in Mint Macaron. The Scalloped Tag Topper Punch is next and the ribbon threads through the holes on both sides for some visual interest.

That gorgeous bloom on top of the package is made with the Floral Framelit Dies and the new In Color Cotton Paper! This paper.....oh, I'm telling ya! I'm going to hoard it! The flowers it creates are so beautiful! Thicker and stronger than tissue paper, it lets you manipulate it in any direction and back again!!! Love this stuff!
Obviously you recognize the Butterfly Basics Stamp set here as well as the Butterfly Thinlits. Do you see that sweet little Mint Macaron embellishment on top of the butterfly? Oh yes...so purdy!
So I dare you to play a game of I spy!
Lots for things to show you coming up! Stay tuned!!!!
Wednesday, May 6, 2015
Regarding Dahlias Retiring Card

Two of my favorite products hit the 2015 Retiring List this year, so help me mourn their loss I decided to share a simple thank you card!
Bermuda Bay and Calypso Coral go beautifully together, add some Whisper White and you have a winning combination!

So here's the paper you'll need for this project:
Bermuda Bay Card Stock: 5 1/2" X 8 1/2" scored at 4 1/4
4" X 5 1/4"
Whisper White: 3 7/8" X 5 1/8"
4" X 5 1/4" (inside piece)
1/2" X 4"
Calypso Coral: 5/8" X 4"
Start by cutting out the Window Frame Framelit in the center of your Bermuda Bay piece. I used the 3rd from the largest. Then run that piece through the Big Shot with the Spring Flowers EF.
Stamp the dahlia in Calypso Coral ink in the center of your 3 7/8" X 5 1/8" piece of Whisper White.
Stamp your sentiment on your small piece of Whisper White with Bermuda Bay ink. Pennant both ends with the Banner Punch or with your Paper Snips. Pennant one end of your Calypso Coral card stock as well. Layer the sentiment piece on with SNAIL adhesive.
On the back of your embossed and die cut piece of Bermuda Bay, place Dimensionals all over the back. Be generous here, you don't want your card to fall flat. Place it over the Whisper White piece being sure not to let any white card stock to peek out from behind the Bermuda Bay. Tie a small piece of ribbon around one side of the frame. Use adhesive to attach this piece to the card. Now place one Dimensional on the pennant'd end of your sentiment piece. Place adhesive on the rest and place it on your card.
That's it! It's ready to send!
Watch the video below for a good laugh and full instructions (lots of sarcasm in this one : )
Click any of the supplies below to go straight to my online store!


Subscribe to:
Posts (Atom)